Appearance
Inventory
Categories
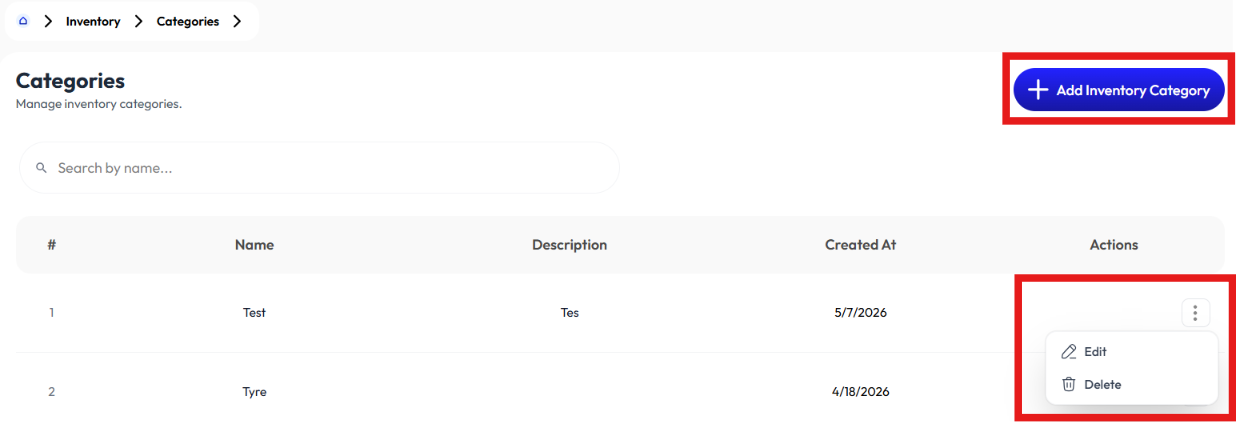
- User creates category using the Add Inventory Category button.
- User modifies category using the Edit button.
- User deletes category using the Delete button.
Add Inventory Category
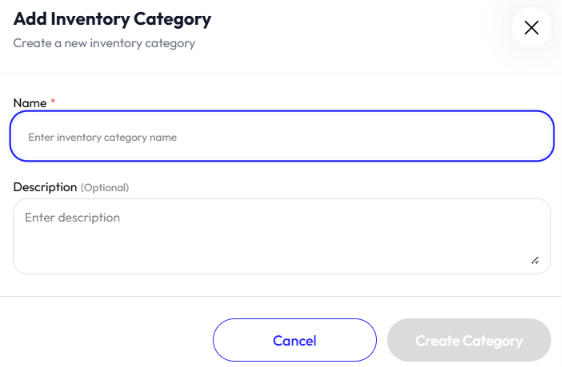
- Click add inventory category button
- Enter name
- Enter description (optional)
- Click create inventory category
Edit Inventory Category
- Click action button
- Click edit
- Update name
- Update description (optional)
- Click save changes
Delete Inventory Category
- Click action button
- Click delete
- Click ok
Item Groups
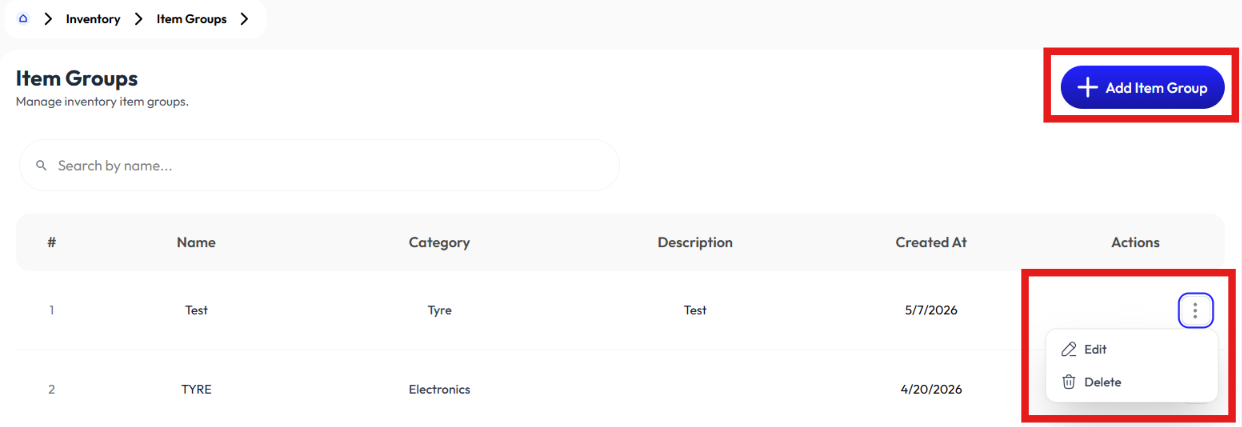
- User creates group using the Add Item Group button.
- User modifies group using the Edit button.
- User deletes group using the Delete button.
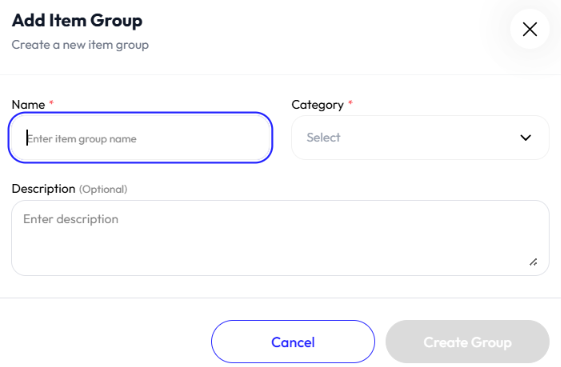
Add Item Group
- Click add item group button
- Enter name
- Select category. To add category check Add Inventory Category
- Enter description (optional)
- Click create item group
Edit Item Group
- Click action button
- Click edit
- Update name
- Select category. To add category check Add Inventory Category
- Update description (optional)
- Click save changes
Delete Item Group
- Click action button
- Click delete
- Click ok
Vendor
- User creates vendor using the Add Vendor button.
- User modifies vendor using the Edit button.
- User deletes vendor using the Delete button.
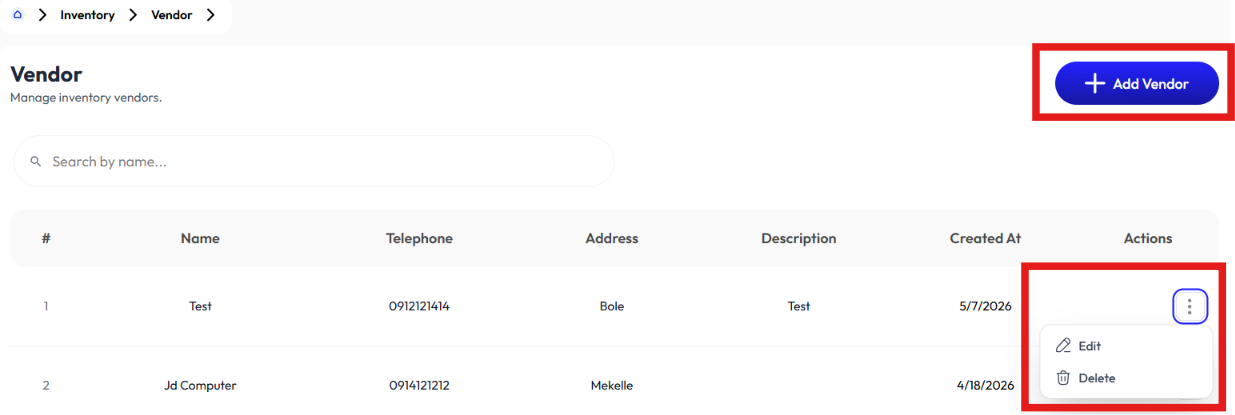
Add Vendor
- Click add vendor button
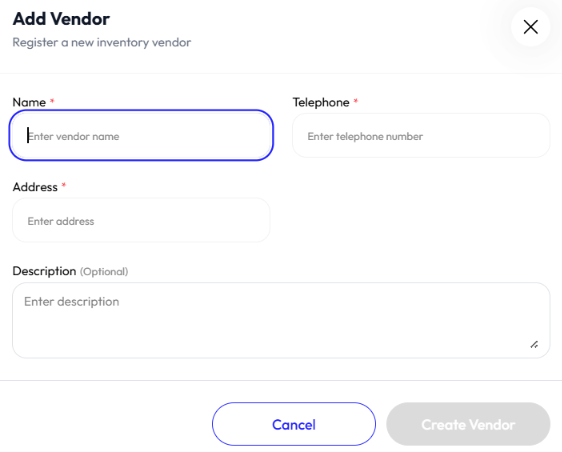
- Enter name
- Enter telephone
- Enter address
- Enter description (optional)
- Click create vendor
Edit Vendor
- Click action button
- Click edit
- Update name
- Update telephone
- Update address
- Update description (optional)
- Click save changes
Delete Vendor
- Click action button
- Click delete
- Click ok
Items
- User creates item using the Add Inventory Item button.
- User modifies item using the Edit button.
- User deletes item using the Delete button.
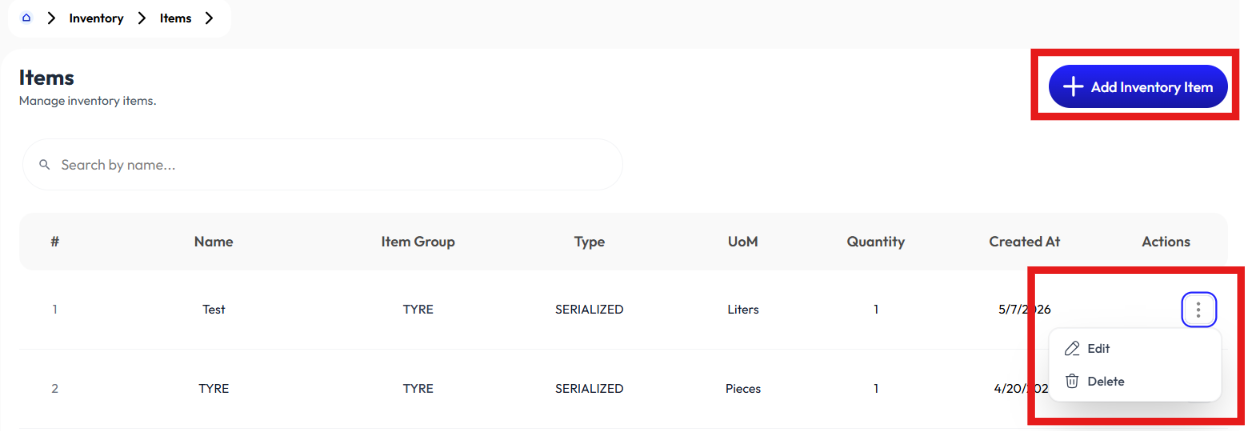
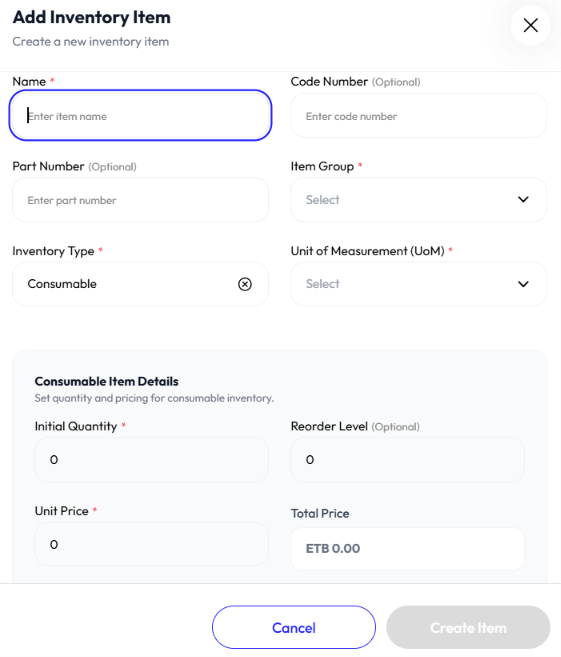
Add Inventory Item
- Click add inventory item button
- Enter name
- Enter code number (optional)
- Enter part number (optional)
- Select item group. To add item group check Add Item Group
- Select item type (consumable, serialized)
- Select unit of measurement (liters, kgs, pieces, meters, ream, packet)
- Click create inventory item
Edit Inventory Item
- Click action button
- Click edit
- Update name
- Update code number (optional)
- Update part number (optional)
- Select item group. To add item group check Add Item Group
- Select item type (consumable, serialized)
- Select unit of measurement (liters, kgs, pieces, meters, ream, packet)
- Click save changes
Delete Inventory Item
- Click action button
- Click delete
- Click ok
Store Requisition
- User creates requisition using the Create Requisition button.
- User modifies requisition using the Edit button.
- User approves or rejects requisition using the Approve and Reject button.
- User deletes requisition using the Delete button.
- User sees information using the Detail button.
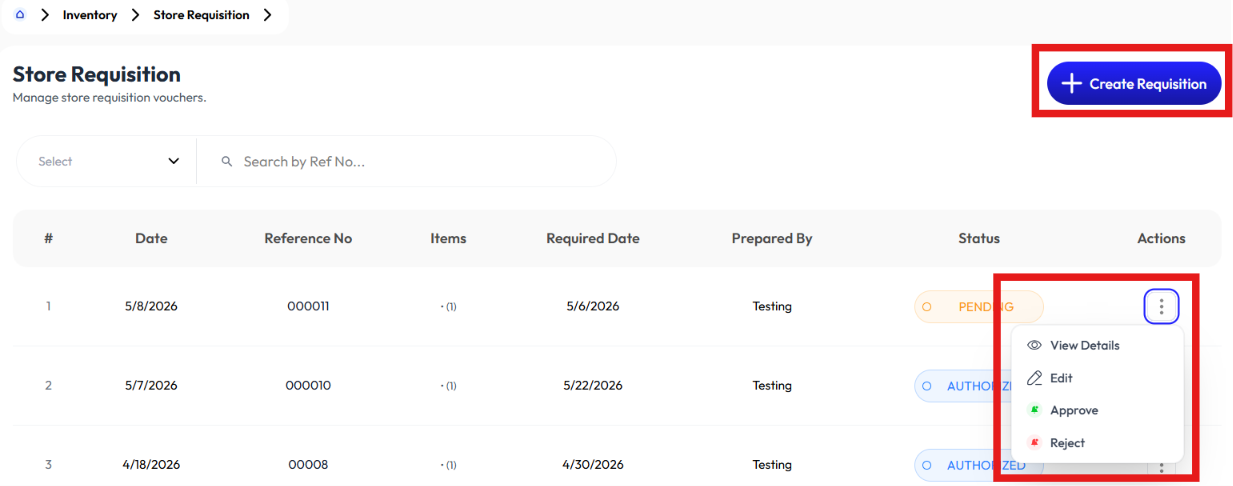
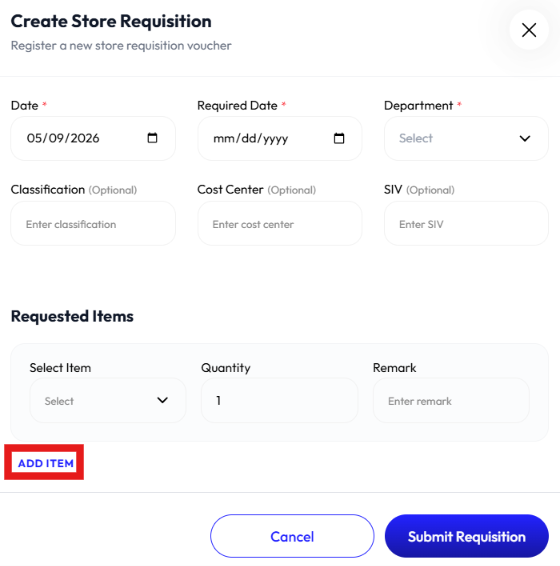
Add Requisition
- Click add Requisition button
- Enter date
- Enter required date
- Select department (operation, finance, maintenance, management, human resource, IT)
- Enter classification (optional)
- Enter cost center (optional)
- Enter SIV (optional)
- Select items. To add items check Add Inventory Item
- Enter quantity
- Enter remark (optional)
- Click add item to add more items
- Click submit Requisition
Edit Requisition
- Click action button
- Click edit
- Update date
- Update required date
- Select department (operation, finance, maintenance, management, human resource, IT)
- Update classification (optional)
- Update cost center (optional)
- Update SIV (optional)
- Select items. To add items check Add Inventory Item
- Update quantity
- Update remark (optional)
- Click add item button to add more
- Click save changes
Approve Requisition
- Click action
- Click approve
- Enter quantity
- Click ok
Reject Requisition
- Click action
- Click reject
- Click ok
Delete Requisition
- Click action button
- Click delete
- Click ok
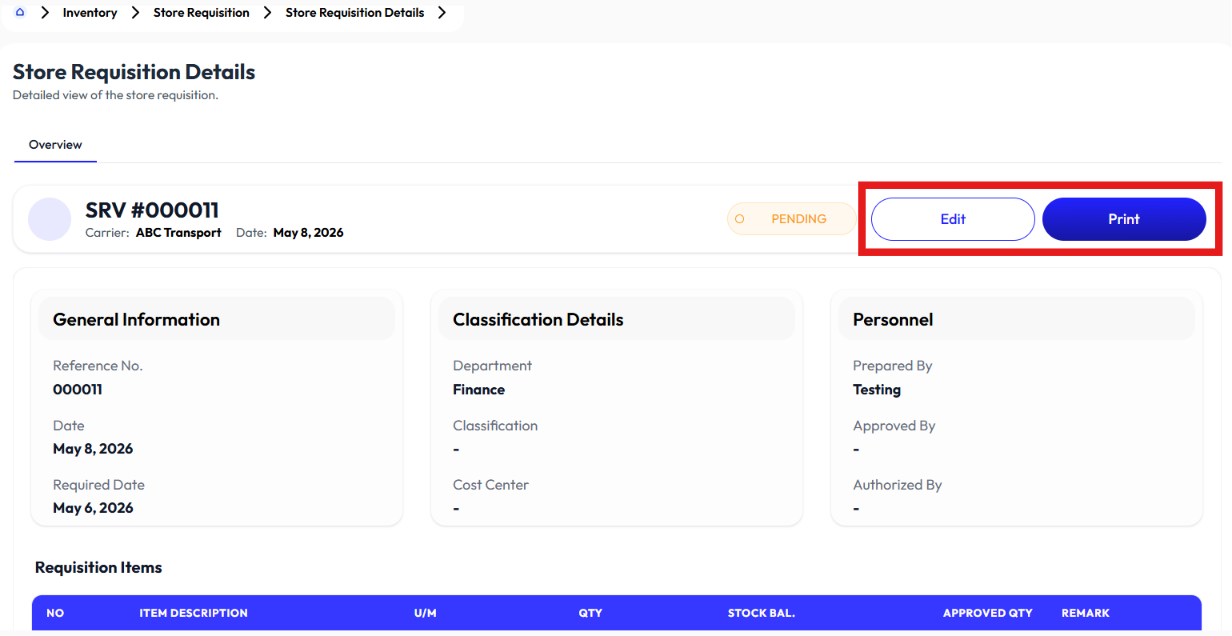
Detail Requisition
- Click action button
- Click detail
- Click print to print
- Click edit to edit a requisition
Purchase Requisition
- User creates requisition using the Create Requisition button.
- User sees information using Detail button.
- User approves or rejects requisition using the Approve and Reject button.
- User modifies information using Edit button.
- User removes purchase requisition using the Delete.
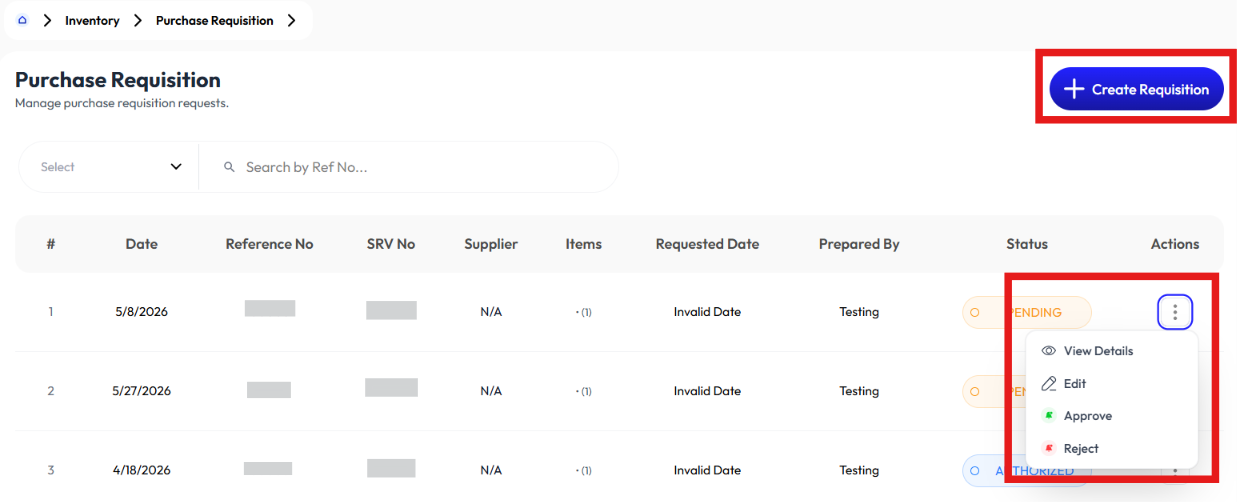
Add Purchase Requisition
- Click create requisition button
- Select store requisition
- Enter date
- Enter requested date
- Enter supplier name (optional)
- Enter item name
- Enter quantity
- Enter load time
- Enter SRV no
- Enter remark
- Click add item
- Enter overall remark (optional)
- Click submit requisition
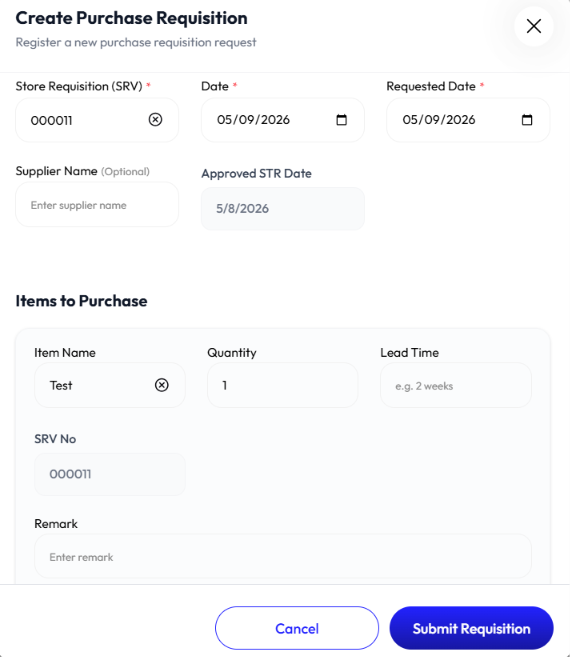
Detail Purchase Requisition
- Click action
- Click detail
- Click edit to edit
- Click print to print
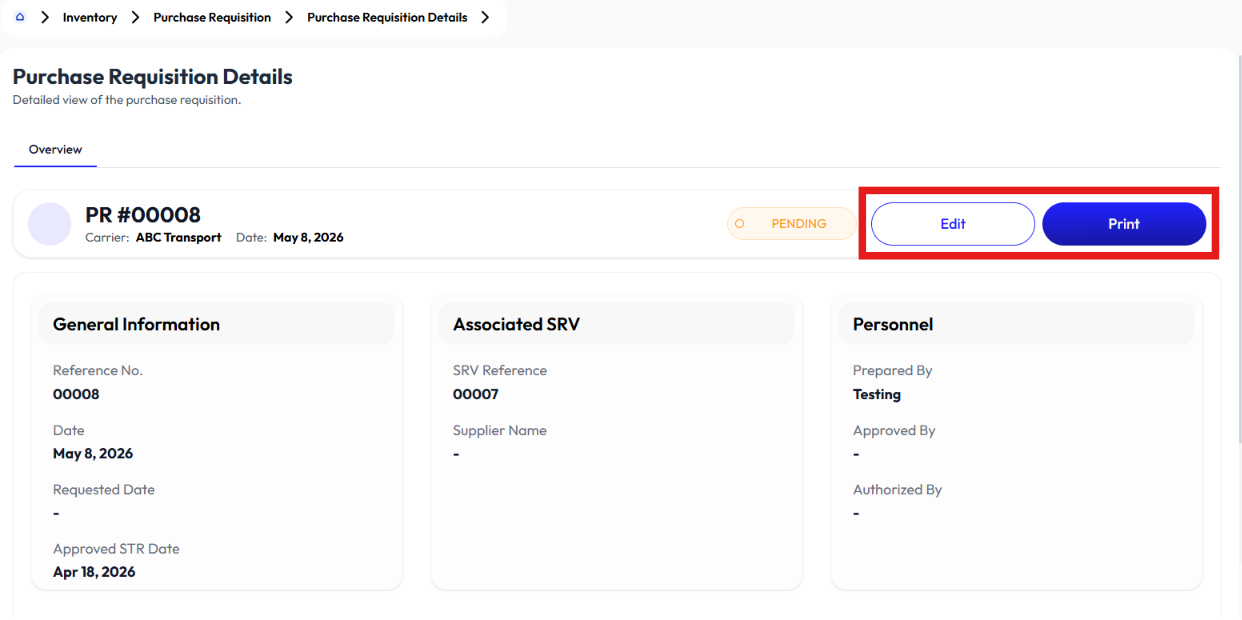
Approve Purchase Requisition
- Click action
- Click approve
- Enter quantity
- Click ok
Reject Purchase Requisition
- Click action
- Click reject
- Click ok
Edit Purchase Requisition
- Click action button
- Click edit
- Select store requisition
- Update date
- Update requested date
- Update supplier name (optional)
- Update item name
- Update quantity
- Update load time
- Update SRV no
- Update remark
- Click add item
- Update overall remark (optional)
- Click submit requisition
Delete Purchase Requisition
- Click action button
- Click delete
- Click ok
Purchase Order
- User creates purchase order using the Create Purchase Order button.
- User sees information using the Details button.
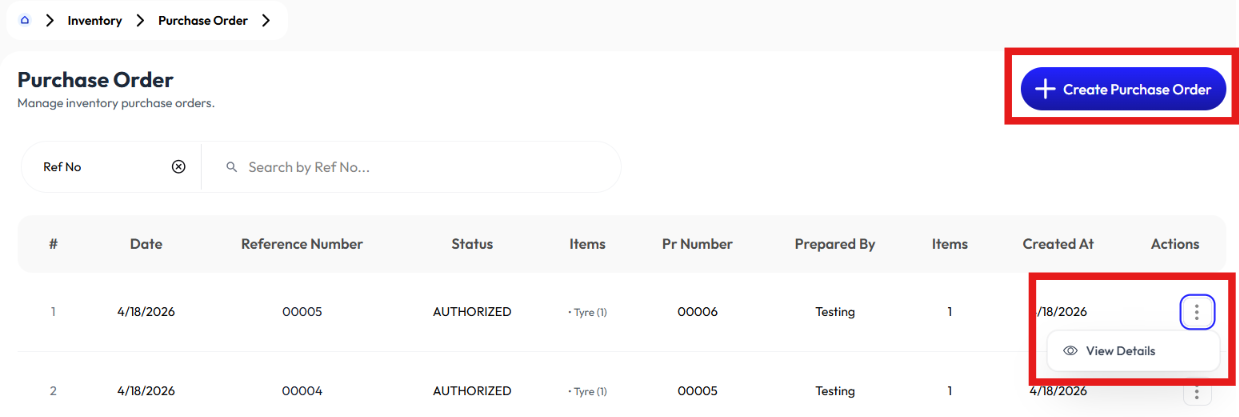
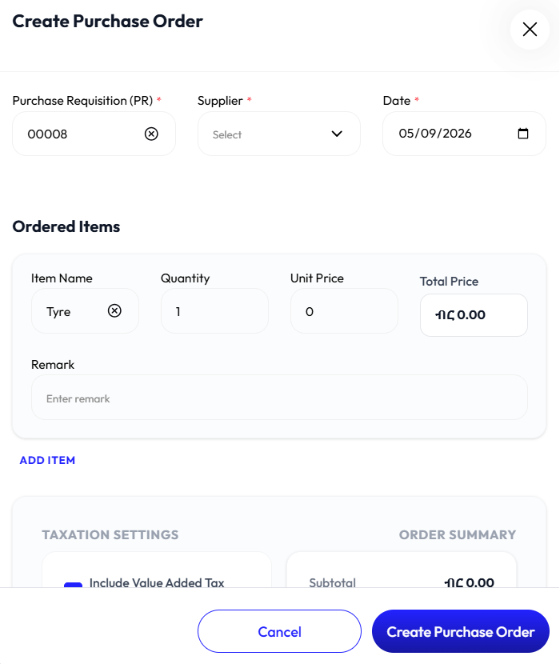
Add Purchase Order
- Click create purchase order button
- Select purchase requisition
- Select supplier
- Enter date
- Enter item name
- Enter quantity
- Enter unit price
- Enter remark
- Click add item to add more items
- Click include VAT to include it
- Enter tax (optional)
- Click create purchase order
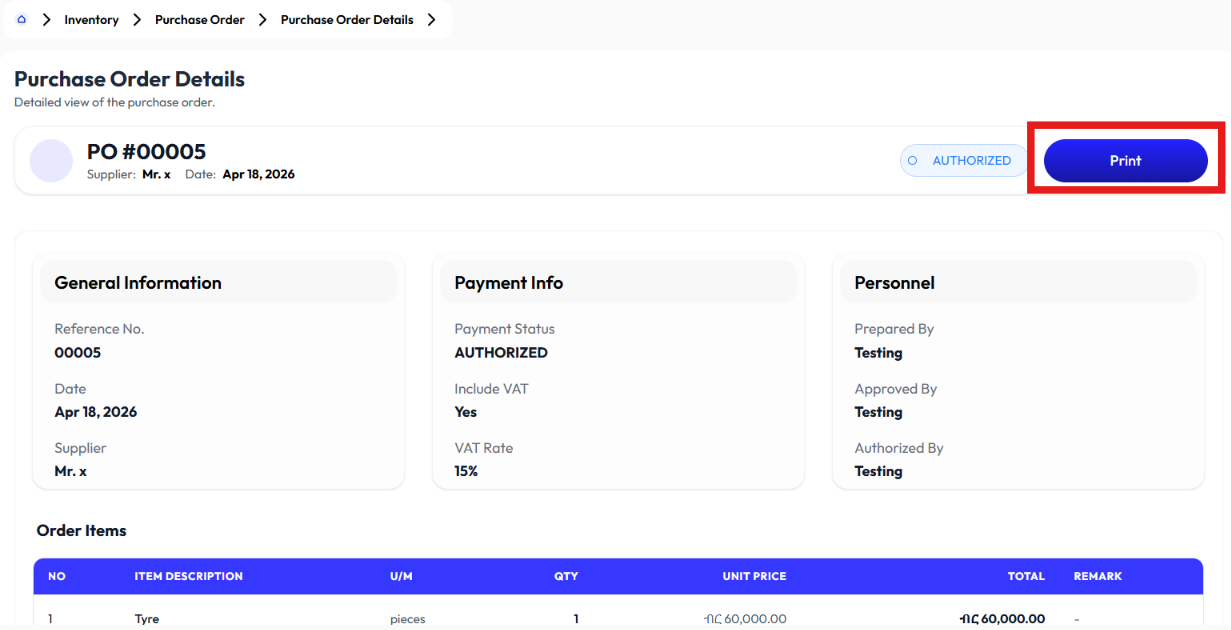
Detail Purchase Order
- Click action button
- Click details
- Click print to print
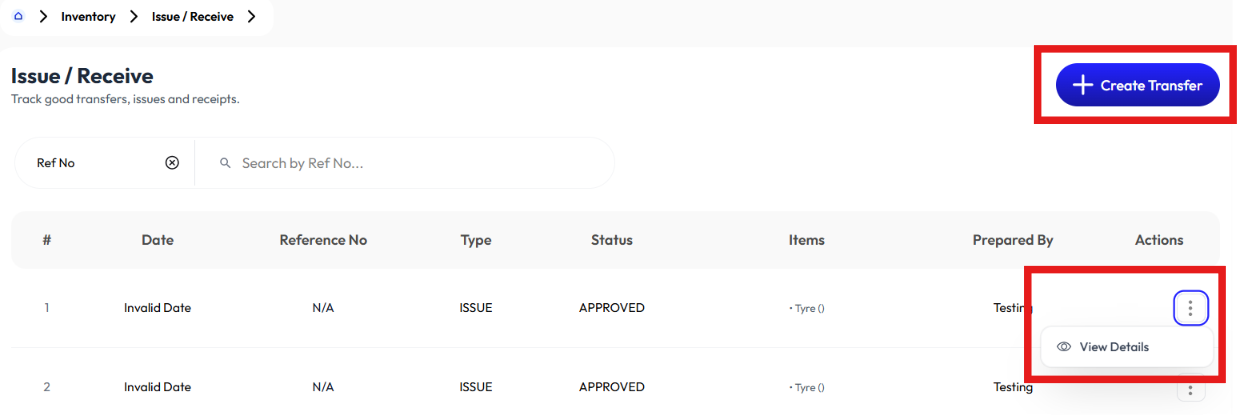
Issue / Receive
- User creates transfer using the Create Transfer button.
- User sees information using the Details button.
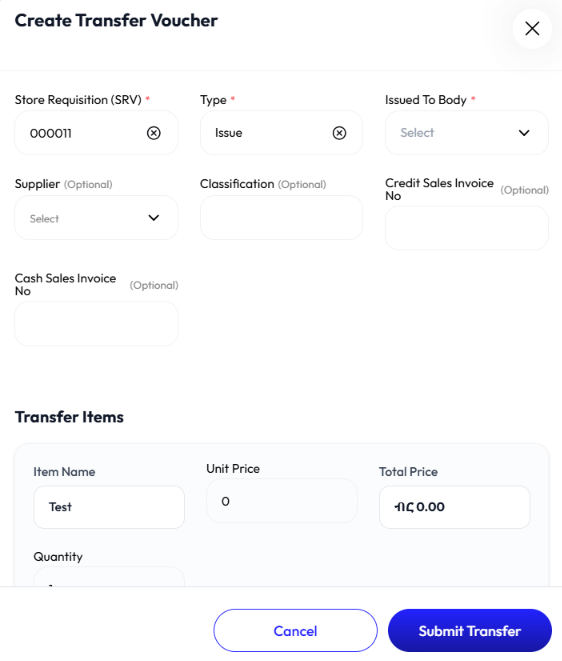
Add Good Transfer
- Click create transfer action
- Select store requisition
- Select type (issue, receive)
- Select issued to body (contact, vehicle, store)
- Select supplier (optional)
- Enter classification (optional)
- Enter credit sales invoice number (optional)
- Enter cash sales invoice number (optional)
- Enter unit price
- Enter quantity
- Click add serial number to add serial number
- Enter remark
- Click submit transfer
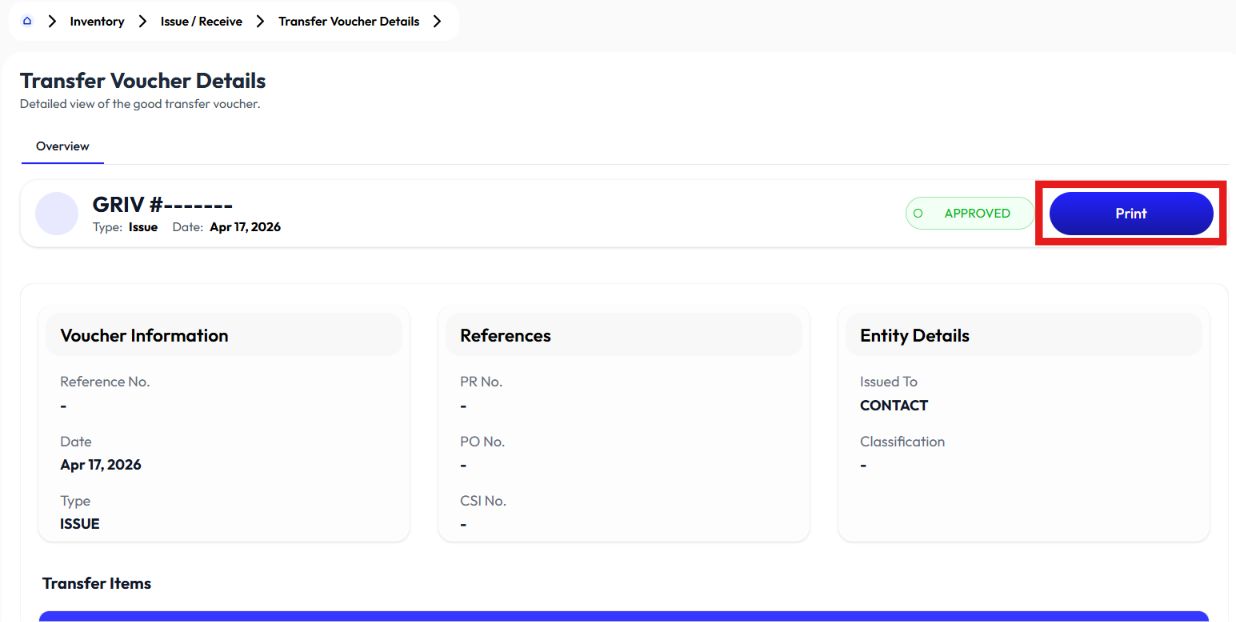
Detail Transfer Voucher
- Click action button
- Click detail