Appearance
Operations
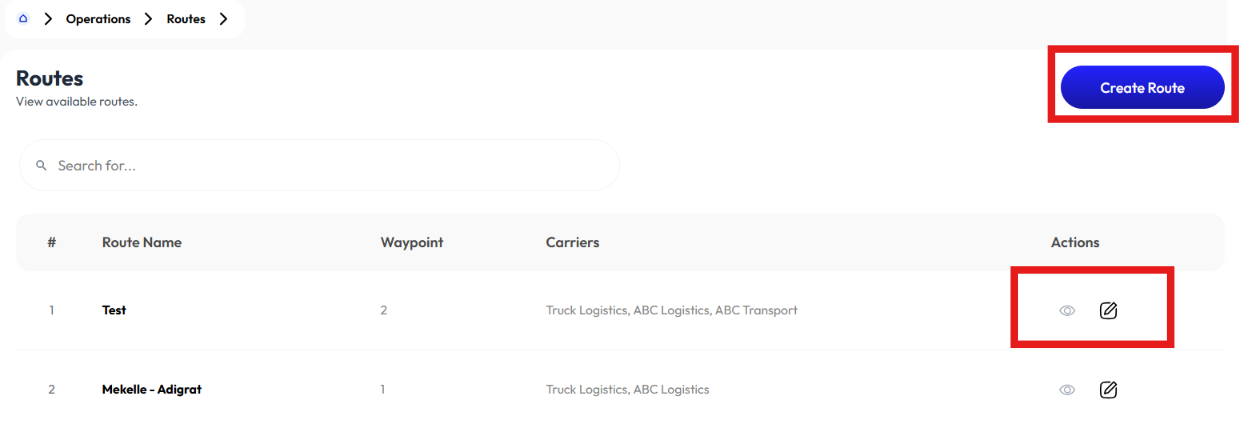
Routes
- User creates routes using the Create Route button.
- User displays route content by clicking on Details.
- User modifies information using the Edit button.
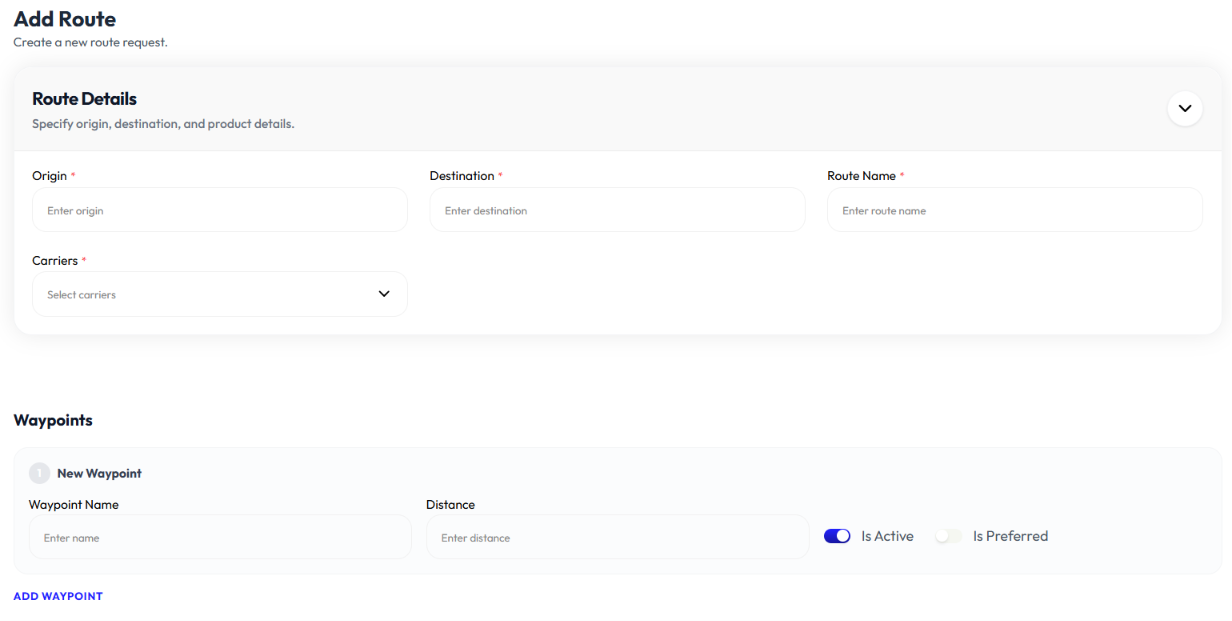
Add Route
- Click create route button
- Enter origin
- Enter destination
- Enter route name
- Select carrier
- Click add waypoint to add more waypoints
- Enter name
- Enter distance
- Select is active on or off
- Select is preferred on or off
- Click remove waypoint to remove waypoint
- Click submit
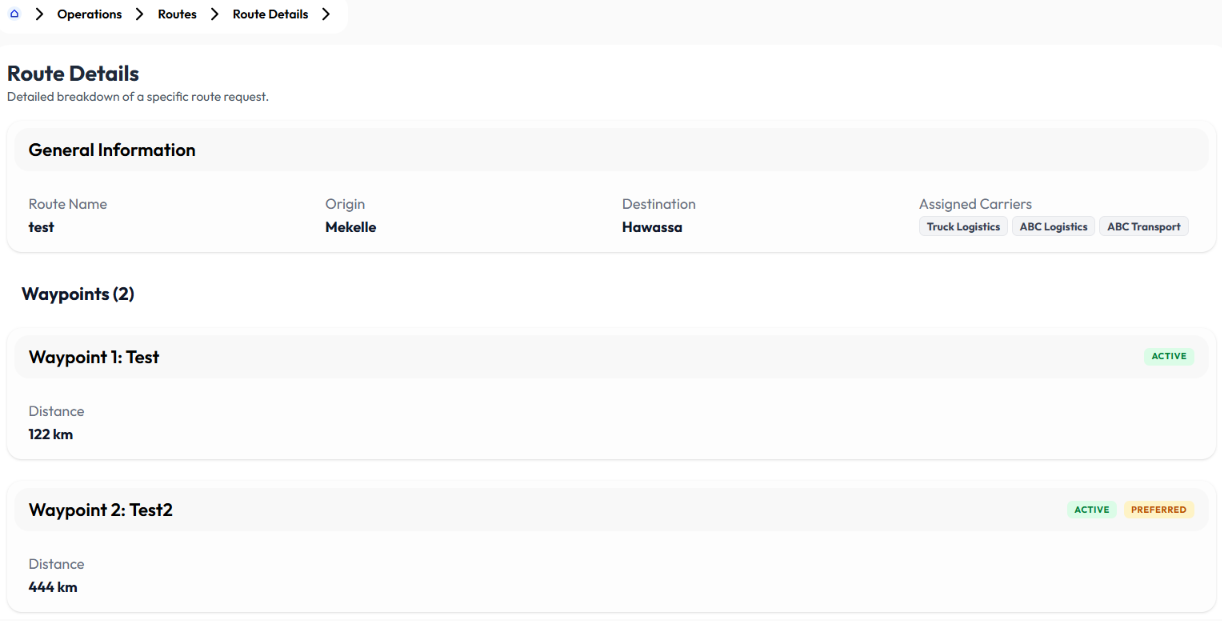
Detail Route
Click on a route to display:
- route information
- waypoints
Edit Route
- Click edit button
- Update origin
- Update destination
- Update route name
- Select carrier
- Click add waypoint to add more waypoints
- Update name
- Update distance
- Select is active on or off
- Select is preferred on or off
- Click remove waypoint to remove waypoint
- Click submit
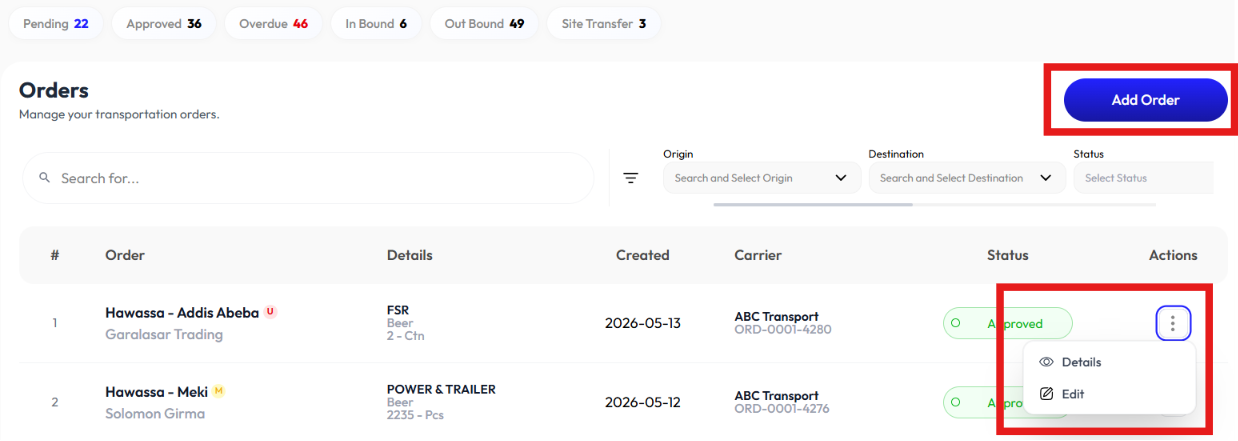
Orders
- User creates order using the Add Order button.
- User clicks on an order to display Detail button.
- User modifies it using the Edit button.
- User searches for orders by inputting the order code inside the search bar.
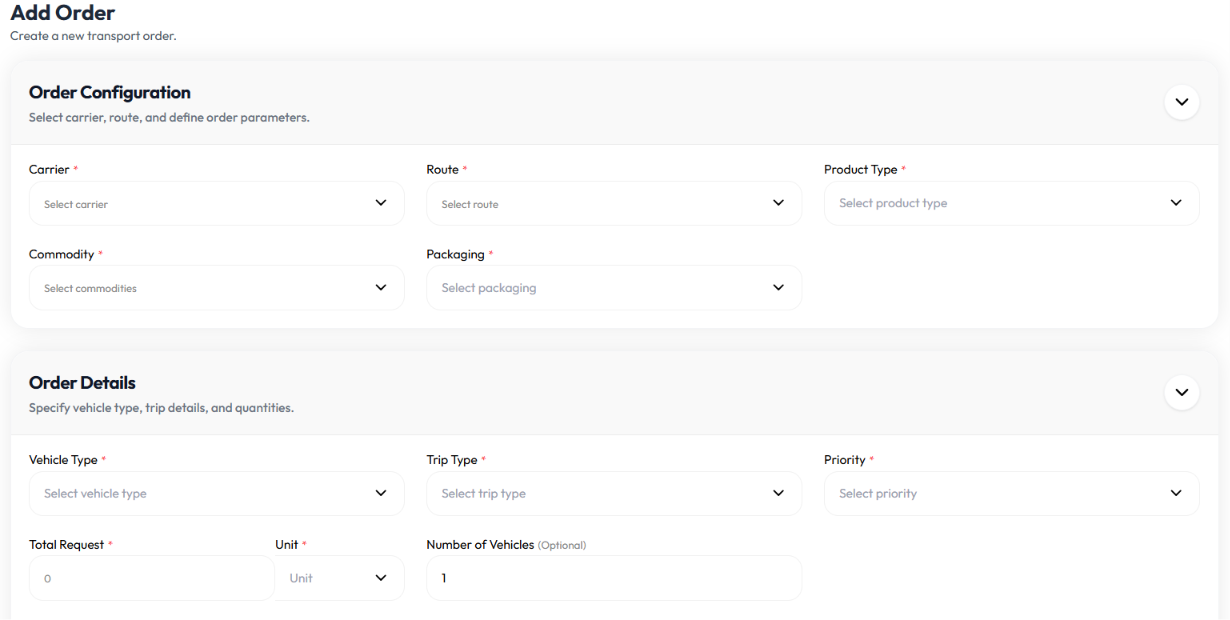
Add Order
- Click add order button
- Select Carrier. To add carrier check Add Carrier
- Select route. To add routes check Add Route
- Select product type
- Select commodity (optional)
- Select packaging
- Select vehicle type
- Select trip type (single trip, round trip)
- Select priority (urgent, high, medium, low)
- Enter total request
- Select unit
- Enter number of vehicles (optional)
- Enter remark (optional)
- Click create order
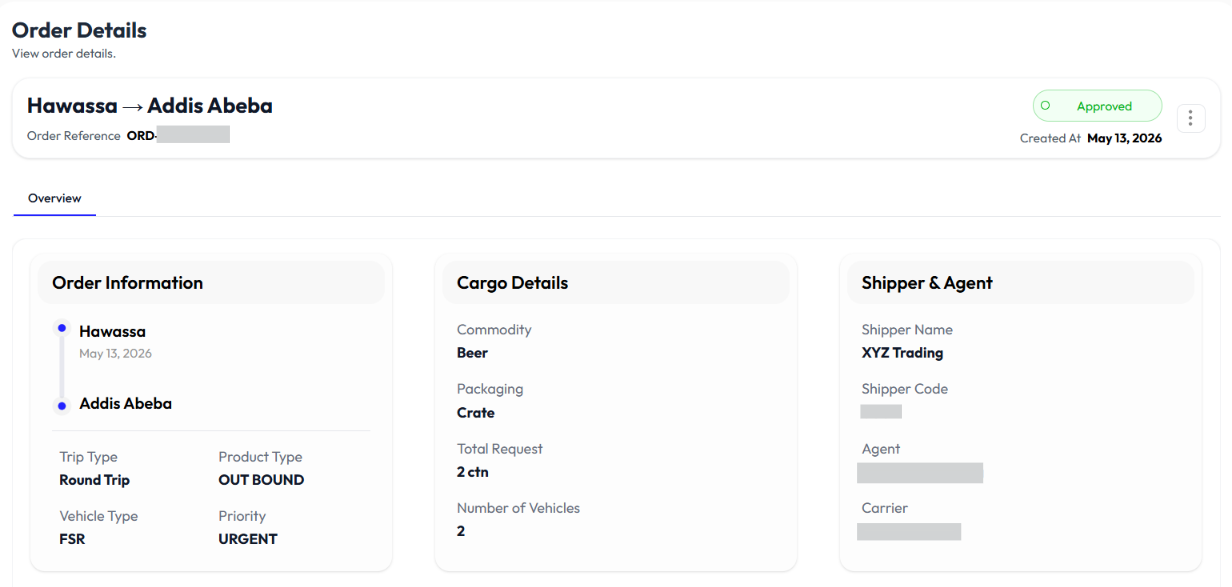
Detail Order
- Click on an order to display detail information
Edit Order
- Click action button
- Click edit
- Select Carrier. To add carrier check Add Carrier
- Select route. To add routes check Add Route
- Select product type
- Select commodity (optional)
- Select packaging
- Select vehicle type
- Select trip type (single trip, round trip)
- Select priority (urgent, high, medium, low)
- Update total request
- Select unit
- Update number of vehicles (optional)
- Update remark (optional)
- Click create order
Shipments
- User clicks on a shipment to display Detail.
- User clicks the Download button to download excel file.
- User modifies shipments by clicking on the Edit icon.
- User searches for shipments by inputting the shipment code in the search bar
Detail Shipment
- Click on a shipment
- See basic shipment information
- See document uploads
- Choose file
- Click upload
- See empty return
- Click add empty return to add empty return
- Enter date
- Enter distance (optional)
- Enter from location
- Enter to location
- Enter remark (optional)
- Click save
Download
- Click download button
- Select raw material, full product, all
Edit Shipment
- Click the edit button to display voucher